5 steps of turf installation on concrete
In most cases, artificial grass is utilised to replace a lawn in a garden. However, It's also great for revitalising old, worn-out concrete patios and walkways. Although we always advocate contacting a professional for turf laying in Sydney, you might be amazed at how simple it is to put artificial grass on concrete. In addition, artificial grass has a slew of advantages, including cheap maintenance, lack of mud and litter, and suitability for children and dogs. As a result, many individuals utilise artificial turf to improve their yards.
Artificial grass can be used for various
purposes, the most obvious of which is to substitute a lawn in a home garden.
Other applications include schools and playgrounds, sports pitches, golf putting
greens, events and exhibits, and artificial grass can even be installed within
the home, making it a terrific feature in children's bedrooms. As you might
guess, each application necessitates distinct installation procedures and
strategies; there is no one-size-fits-all solution. Of course, the best method
will be determined by the application. For example, artificial grass can be
laid down on concrete, block paving, or even patio paving slabs.
We'll go over how to install artificial grass on concrete and paving in our guide for turf laying in Sydney. We'll go through how to prepare the existing concrete for installation, the gear you'll need, and a helpful step-by-step guide on how to complete the job.

·
Artificial
Grass Installation on Concrete
We always recommend hiring a professional to install artificial grass since their knowledge and experience will ensure a better result. Artificial grass on concrete, on the other hand, is relatively quick and straightforward to install, and if you have any DIY skills, you should be able to do it yourself. Our step-by-step guide will guide you through the process.
·
Tools
That Are Required
Let's take a look at some of the tools
you'll need to put artificial grass on concrete before we get started with our
step-by-step guide:
o Broom
with a stiff handle
o Garden
hose
o Stanley
Knife (along with a bunch of sharp blades)
o A
filling or stripping knife (to spread the artificial grass adhesive)
We may begin the process of turf laying in Sydney now that you have the essential tools and materials.
·
Step 1: Get the
surface ready
The artificial grass or foam underlay must be able to adhere to the concrete surface well. Any sand, grit, or debris will disrupt this connection, causing your fake grass to slide and fold after it is installed. Use a hose, brush, or power washer, remove any filth and allow to dry.
·
Step 2: Put the drainage
holes in
Artificial grass must also be able to drain, or it will become a huge sponge that soaks up everything it comes into contact with. So, using a masonry drill bit, drill holes through the concrete surface and fill them with large stones to allow water to reach the absorbent layers beneath the concrete. The number of holes you'll need will be determined by how the water drains now. Water that pools in one area, for example, may only require one or two holes in that area. Before moving on to the next stage, make sure the surface is entirely dry.
·
Step 3: Place the
underlay first
When beginning the process of turf laying in Sydney, we always recommend that you use underlay. However, depending on what you want to do with it, it may be a waste of money. Somewhat uneven surfaces will be levelled and gentle to the touch with foam underlay. Underlay is required if kids will use the area or if sports will be played on it. If the surface is level enough, you may be able to get away without it if you don't plan on using it much. You can proceed to the following step after the underlay has been bonded in place.
·
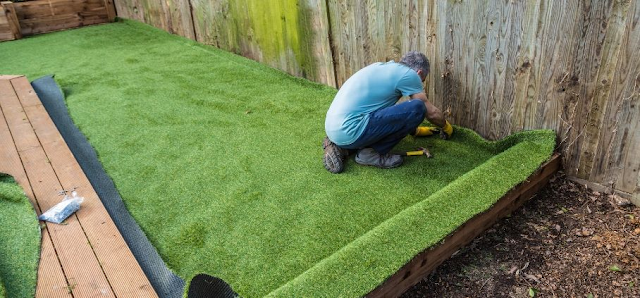
Step 4: Install the
artificial grass
Before cutting or gluing the grass, lay
it out where it will go, just like you did with the underlay. Make sure the
underlay is securely fastened to prevent it from moving. You'll need the
correct kind of artificial grass glue to make sure it stays put. Glue the edges
that will not be cut. If your artificial grass sits flush against a wall, start
with that region and work your way out. Cut the remaining pieces to size. It's
time to cut it to shape once you're satisfied; everything fits together
correctly.
It's not always easy to cut, so this can be more difficult than it appears. If you want to be safe, leave a bit extra, which may be trimmed or tucked under afterward. Glue the joints together. As you work your way backward, make sure to press down on the joints you reach. Cut a strip of joint tape the length of the joint to do this. Use a generous amount of adhesive to cover the joint tape all the way along the underside of the joint; the joint tape should be half attached to one sheet and haft to the other.
·
Step 5: Sanding and
brushing
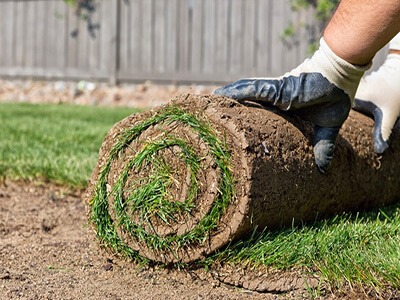
Most artificial grass is stored in rolls
and will be flattened when you receive it. Use a stiff-bristled broom to push
the fibers back into their upright position to perk it up again. Sand is not
required. It's popular among some users since it protects the artificial grass
from minor damage and minimises the heat it absorbs in the summer. Others
dislike it because it is, after all, sand, and it spreads like wildfire.
Disclaimer: This is a generic Information & post; content about the services can be changed from time to time as per your requirements and contract. To get the latest and updated information, contact us today or visit our website.

Comments
Post a Comment